Path of Exile 2 Towers and Precursor Tablets Guide – Maximizing Map Rewards

In Path of Exile 2, the endgame Atlas introduces players to an intricate system of Towers and Waystones, which can be leveraged to maximize map rewards and enhance gameplay efficiency. For players looking to get the most out of their Atlas experience, understanding Towers, Precursor Tablets, and how to “juice” Maps for higher difficulty and better loot is essential. This guide covers the basics of these mechanics and how to utilize them in PoE 2 effectively.

What Are Towers in PoE 2?

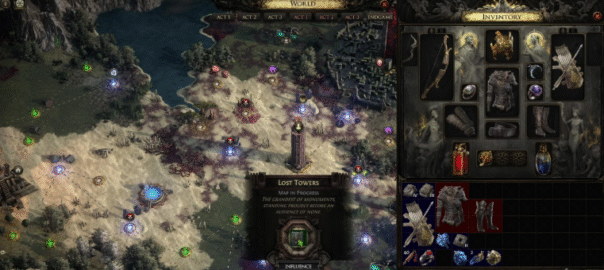
Towers are specialized Waystones that stand out on the Atlas due to their unique layouts. Unlike regular Waystones, completing a Tower not only reveals nearby areas on the Atlas but also guarantees a Precursor Tablet drop. Towers serve as milestones in the endgame, encouraging players to tackle progressively harder content to unlock new zones and rewards.

After completing the campaign, you’ll unlock the Atlas system, where Waystones and Towers form a branching network of zones. Each Tower you conquer opens new paths to tougher challenges – and greater rewards, including rare Path of Exile 2 Items and crafting materials.

Key Functions of Towers:

·Reveal nearby areas on the Atlas upon completion.

·Drop a Precursor Tablet for further customization of Waystones.

·Provide unique layouts that differ from standard Maps.

Tower Layouts

There are currently five Tower layouts in PoE 2, each offering a distinct challenge:

1. Bluff

2. Lost Towers

3. Mesa

4. Sinking Spire

5. Alpine Ridge

Regardless of the layout, the goal is the same: traverse the Tower and activate the Precursor Beacon at the end. Successfully doing so not only yields a Precursor Tablet but also increases visibility on the Atlas, giving players strategic insight into nearby Waystones.

If you’ve invested in buying POE2 Items to strengthen your build, these Towers can be cleared much faster – especially on high-tier maps with multiple modifiers.

Precursor Tablets: Boosting Map Content

Precursor Tablets are items that players can attach to Waystones to enhance Map content. These Tablets can introduce additional league mechanics, such as Breach, Delirium, Ritual, or Expedition encounters, while also increasing difficulty and rewards.

Tablet Usage Rules:

1. Tablets have a limited number of uses before being destroyed.

2. A Waystone’s number of modifiers determines how many Tablets can be applied:

·0-2 Modifiers: 1 Tablet Slot

·3-5 Modifiers: 2 Tablet Slots

·6+ Modifiers: 3 Tablet Slots

Players can apply multiple Tablets of the same type to maximize specific mechanics or mix different Tablets for a variety of bonuses.

Types of Precursor Tablets

The following are the primary Precursor Tablet types in PoE 2:

·Breach Precursor (Tablet): 12-18 Maps in range contain Breaches

·Delirium Precursor (Tablet): 12-18 Maps contain Mirrors of Delirium

·Expedition Precursor (Tablet): 12-18 Maps contain Expedition encounters

·Ritual Precursor (Tablet): 12-18 Maps contain Ritual Altars

·Precursor (Tablet): 12-18 Maps are Irradiated (+1 Area Level)

·Overseer Precursor (Tablet): 2-4 Maps contain Bosses

All Tablets are Magic Rarity, capable of rolling one Prefix and one Suffix. Prefixes generally provide generic Map-wide bonuses, while Suffixes are tailored to enhance the specific league mechanic associated with the Tablet.

Tablet Prefixes

Precursor Tablet prefixes enhance general Map rewards, making them crucial for XP and loot farming:

·10-15% increased Item Rarity

·3-7% increased Item Quantity

·3-7% increased Pack Size

·15-25% increased Magic Monsters

·10-15% increased Gold

·5-10% increased Experience Gain

When a Tablet with these prefixes is applied to a Waystone, each Map affected gains these bonuses in addition to the specific mechanic the Tablet adds.

Tablet Suffixes

Suffixes are tailored to the specific mechanics of the Tablet:

·Breach Tablet Suffixes: Increase the number of Magic/Rare monsters in Breaches.

·Expedition Tablet Suffixes: Boost the quantity of Artifacts dropped by Expedition enemies.

·Delirium Tablet Suffixes: Enhance rewards from Mirrors of Delirium.

·Ritual Tablet Suffixes: Improve loot from Ritual Altars.

·Overseer Tablet Suffixes: Add Strongboxes, Shrines, Essences, and increase the rarity/quantity of Boss loot.

These specialized suffixes ensure that players can fine-tune the rewards of their Atlas runs, creating targeted farming strategies.

Unique Tablets and Advanced Usage

In addition to standard Precursor Tablets, PoE 2 features Unique Tablets that alter how league mechanics function in Waystones. Each Unique Tablet comes with an implicit modifier related to its mechanic, allowing players to customize difficulty and rewards further. For example, certain Unique Tablets may increase pack size for a specific mechanic or enhance specific types of loot drops.

Players looking to maximize XP, Currency, or gear farming should experiment with combinations of standard and Unique Tablets. This allows for highly optimized Atlas runs, tailored to endgame goals.

Conclusion

Towers and Precursor Tablets are essential components of Path of Exile 2’s endgame Atlas. By understanding how Towers work, the types of Tablets available, and how to properly apply them to Waystones, players can increase Map difficulty, unlock additional encounters, and maximize loot and XP gain.

Whether you are aiming to farm Breaches, boost Expedition drops, or irradiate Maps for tougher challenges, integrating Precursor Tablets into your Atlas strategy is critical for efficient endgame progression. Mastering these mechanics will give players the edge needed to dominate PoE 2’s Atlas and achieve maximum rewards from each Map run.


Diablo 4 Season 10 PTR Guide:Chaos Perks, Broken Builds

Season 10 of Diablo 4 is closing in, and the PTR (Public Test Realm) has already lit up the community with wild new mechanics, absurd damage numbers, and plenty of heated class debates. With Chaos Armor, Chaos Perks, Infernal Hordes, and sweeping balance changes, the Season 10 meta is shaping up to be one of the most explosive yet.

Chaos Armor & Chaos Perks – The Core of Season 10

Two major systems are completely redefining the way builds function this season:

1.Chaos Armor – A new layer of gear customization that allows players to relocate uniques into different slots. This means you can double up on certain categories (like equipping two helms) or free up jewelry slots by moving amulet effects elsewhere. The result? Insane dual-unique combos and builds that were previously impossible.Unlock the power of Diablo IV with MMOexp reliable Diablo 4 gold. Experience the game like never before!

2.Chaos Perks – Seasonal modifiers that overhaul skills in dramatic ways. Some perks eliminate cooldowns, while others grant multiplicative damage scaling that can push DPS into the stratosphere. Many are currently bugged on PTR, making for some of the craziest gameplay Diablo 4 has seen so far.

Together, these mechanics have reshuffled class rankings across the board.

Class Breakdown – Who Rules the PTR?

Barbarian – Hammer of the Ancients Returns

The Barbarian is thriving again thanks to Chaos Armor and buffs to its core builds.

Hammer of the Ancients (HoTA):Back in the spotlight, tearing through Tier 100 Pits in under 9 minutes.

Mighty Throw:Still the king for specialized Pit pushing.

Dual Swing:Shines in Infernal Hordes where mob density pays off.

With Chaos Armor enabling multiple uniques, Barbarians are tanky, high-damage, and flexible.

PTR Verdict:Strong, versatile, and back in the meta spotlight.

Druid – Overabundance is Game-Breaking

Druids are currently the most broken class on PTR, thanks to one perk:Overabundance.

Storm Ravens + Overabundance:Clearing Pit 150 with ease.

Companion Builds:Likely the strongest archetype heading into launch.

Classic Shred/Tempest Roar:Supercharged by Chaos Armor’s unique shuffling.

Even if Overabundance gets nerfed, Druid’s toolkit looks stacked.
PTR Verdict:Utterly OP — expect nerfs before launch.

Necromancer – Blood Wave Becomes Meta

Necros are surging again, this time through Chaos Perk abuse.

Alter the Balance:Turns Blood Wave into a core skill, removes cooldown, and adds an Essence cost.

Alternating Alterations:Massive multipliers when alternating core skills.

The combo creates a spammable, high-scaling Blood Wave build that annihilates bosses. Pair it with Bloodless Scream in Chaos Armor, and Necros free up weapon slots for even more DPS.

Other builds:

Bone Spear:Still reliable.

Skeletal Mages:Show potential but are dragged down by clunky AI.

PTR Verdict:Meta-defining powerhouse — Blood Wave Necro is the build to watch.

Rogue – Death Trap or Bust

Rogues remain the weakest class on PTR, though they do have one standout option.

Death Trap Builds:Best-performing setup, especially in Infernal Hordes.

Twisting Blades:Falls off hard due to poor synergy with Chaos Perks.

Reload-based Unique:Looks strong in theory but clunky in practice with no proper UI support.

Chaos Perks like A Beast Cornered + Marred Guard boost damage but make survival risky.

PTR Verdict:Playable but underwhelming — Death Trap is the only real standout.

Sorcerer – Hydra Endures, Fireball Finds a Niche

The Sorcerer continues to split between two worlds.

Hydra Builds:Consistently strong across Infernal Hordes and Torment 4.

Fireball Bounce:Great for Pit pushing — but only in map layouts with plenty of adds.

Chaos Perks tested:

Mana Shield:Theoretically busted, but drains mana too fast in endgame.

A Beast Cornered + Marred Guard:Now the preferred setup for survivability and burst.

PTR Verdict:Reliable and steady, though not as flashy as Druid/Necro.

Spiritborn – Nerfed, but Still Viable

The newest class took some hits going into Season 10 testing.

Jaguar Spirit Hall:Nerfed, weakening Season 9’s top builds.

Quill Volley:Lost some punch.

Crushing Hand & Rake:Still performing well, with Rake likely to remain near top-tier.

PTR Verdict:Competitive, but not quite in the same league as Druids or Necros.

Season 10 is shaping up to be one of Diablo 4 most chaotic and entertaining metas yet. Chaos Armor and Chaos Perks are rewriting the rules of buildcrafting, and while Druids and Necros currently look unstoppable, Barbarians are back in force, Sorcs remain solid, and even weaker classes like Rogues and Spiritborn still have viable builds for Infernal Hordes.

One thing is certain:launch day will be wild, and balance changes are almost guaranteed before the season goes live.Get your cheap Diablo 4 Items from MMOexp today and dominate every battle with confidence!

Diablo 4 Season 9 Guide: Farm Legendary Items and Level Up Aspects Quickly

If you’re grinding through Diablo 4 Season 9 and still relying on random world drops, Whispers of the Dead, or the Tree of Whispers caches to chase legendaries, you’re already behind. This season isn’t about hoping for RNG-it’s about optimization, efficiency, and maximizing Greater Affix loot. Whether you’re pushing high-level Pits, farming Radiant Tributes, or gambling with opals, mastering the Season 9 loot loop is the only way to keep pace with endgame players.

In this comprehensive guide, we’ll cover how to farm hundreds of legendary items per hour, how to guarantee Greater Affix (GA) gear, and how to extract and use the best legendary aspects to push your builds into the top tier.

What Are Greater Affixes and Why Do They Matter?

Not all legendary items in Season 9 are equal. Greater Affixes (GAs) are enhanced versions of standard affixes, marked by a star next to the stat line.

Why they matter:

·Stronger Rolls: A GA affix has higher values than normal affixes.

·Meta Defining: GA rolls, especially on ancestral gear, can make or break a build.

·Stackable Power: When combined with multiple GAs and the right legendary aspect, you’re holding jackpot-tier gear.

In short, GA ancestral items are the best loot in the game, and the entire farming meta revolves around stacking as many of these as possible.

How Legendary Diablo IV Items Drop in Season 9

Here’s a quick breakdown of some tested legendary sources:

Whisper Tree Caches (World Tier 4)

·Gloves Cache: ~5 legendaries, occasional GA

·Rings Cache: 5-7 legendaries, almost no GA

·Amulet Cache: 12-13 legendaries, sometimes 1 ancestral GA

·Expect: 1 GA every 3-4 caches

Seasonal Reputation Caches

From 5 caches opened:

·6 ancestral legendaries with GA

·5 uniques

·10 standard legendaries

On average: 1 ancestral GA + 2 legendaries + 1 unique per cache.

While decent, these methods pale in comparison to the Pit and Tribute farming.

The Best Legendary Farming Locations

1. Infernal Horde / Tribute Turn-ins

6-7 legendaries per tribute (with a full key)

Tribute Types:

·Carassed: Uber keys

·Harmony: Runes

·Obusite: Crafting mats

Radiant Tribute = most valuable (guarantees GA on armor/amulets)

After 170+ hours of testing, only 11 Radiant Tributes dropped, so use them carefully.

2. The Pit (Levels 75-79)

This is the undisputed king of farming in Season 9.

Why The Pit dominates:

·500+ legendaries per hour

·7,000+ opals per hour

·Top XP/hour gains

·Generates tributes & seasonal reputation

Best source of GA gear

·Ideal Pit Clear Times:

·Pit 75-79: ~90-100 seconds (sweet spot for loot/hour)

·Pit 80-89: Slightly better drops, but clear times 2-3x longer

·Rule of Thumb: Farm the highest Pit you can clear in under 2 minutes.

Why The Pit Is the Endgame of Season 9

The Pit outshines everything else: Uber bosses, Legion Events, and World Bosses simply don’t compare in loot density or efficiency.

The Pit’s key advantages:

·Scaling drop quality with higher mob levels

·Guaranteed tribute drops every run

·The fastest way to farm Radiant and Mythic Tributes

·Best opal/hour farming method

If you want to join the top 1% of Diablo 4 farmers, The Pit is where you live.

How to Use Opals Efficiently

Opals are the currency of power this season. You’ll farm thousands per hour in The Pit, and gambling with them is the best way to secure Greater Affix items.

Best Gambling Strategy:

·Spend in 2,500+ opal batches for efficiency

·Focus on Gloves, Offhands, and Amulets

·Target 1-2 GA affixes

·Sell non-ancestral rolls to vendors (don’t salvage)

Example Results (2,500 opals on offhands):

·7 ancestral legendaries with GA

·2 offhands with double GA

·8 legendaries with single GA

Pro Tip: Your opal/hour is your true farming efficiency metric.

Crafting with Tributes

Tributes are the other pillar of Season 9 progression.

Radiant Tribute:

·Use on armor or amulets

·Guarantees 1 random GA

·Best option for build-defining pieces

Mythic Tribute:

·Adds bonuses (but doesn’t increase GA odds)

·Stack with Radiant Tribute for power crafting

Best Strategy:

·Save Radiant Tributes for amulets (highest value per GA roll).

Farming Legendary Aspects

Legendary aspects are critical for min-maxing your builds.

How to extract & optimize:

1. Early game → Extract aspects from any legendary

2. Mid-game → Extract only from ancestral GA legendaries

3. Endgame → Farm meta aspects (sellable for 10-50M gold each)

4. Focus on aspects tied to cooldown reduction, crit scaling, or multi-effect boosts.

Extra Farming Tips

·Latency matters: High ping makes Sorc builds weaker (avoid reaction-heavy classes).

·Console limitations: Some builds feel clunky-stick to smooth AoE options.

·Play off-peak: Farm early mornings/late nights for smoother gameplay & better efficiency.

·Don’t overfarm high Pits: Pit 89 looks tempting, but if your clears take 3-4 minutes, your loot/hour drops significantly.

Recap: Your Season 9 Legendary Farming Path

1. Farm Pit levels 75-79, aim for <2 min clears

2. Stack 7,000+ opals/hour

3. Gamble Gloves, Offhands, Amulets

4. Vendor trash, don’t salvage

5. Use Radiant Tributes on armor/amulets

6. Extract aspects only from ancestral GA gear

7. Target Harmony & Obusite tributes in The Pit

8. Skip Uber Bosses & World Bosses (low ROI)

9. Play fast, efficient builds for clearspeed

10. Farm during off-peak hours for smoother runs

Final Thoughts

Diablo 4 Season 9 rewards the efficient, not the lucky. Random drops won’t cut it anymore-you need to live in The Pit, stack opals, buy Diablo 4 Items smartly, and use Tributes wisely. By combining Greater Affixes, the right aspects, and a strict focus on efficiency, you’ll be swimming in legendary items while others are still grinding world events.

If you want mythic tributes, perfect GAs, and best-in-slot gear, this farming loop is your ticket to dominating Season 9.

Crafting Your Ultimate OSRS Fletching Guide

If you rely on ranged combat in Old School RuneScape, keeping your ammo stocked is crucial. Running out of arrows or bolts during a fight can be frustrating and potentially costly. Mastering the Fletching skill ensures you always have the ammunition you need while leveling efficiently and possibly earning some profit along the way.

Fletching lets you craft a variety of ranged weapons and ammunition, including arrows, bolts, and darts. This skill is essential for any ranged player who wants to be self-sufficient and ready for battle. To fletch, you gather raw materials and combine them into finished ranged gear that you can use or sell.From beginners to experts, everyone needs OSRS gold – shop with RSgoldfast today!

Preparing Materials

Before you begin leveling Fletching, stock up on supplies. The Grand Exchange is the primary marketplace for logs, feathers, arrow tips, bolt tips, and other components. However, note that the Grand Exchange imposes daily purchase limits which can slow progress if you’re aiming to train in bulk.

Ways to Manage Purchase Limits

Buy in Advance: Accumulate as many materials as possible before starting your fletching session, focusing on items suitable for your current level.

Use Multiple Accounts: If you have extra accounts, use them to gather more supplies, effectively bypassing buy limits.

Trade Player-to-Player: Look for direct trades with other players. Prices and availability fluctuate, so you might find better deals outside the Grand Exchange.

Fletching Leveling Methods

Levels 1–20: Craft Arrow Shafts

Materials: Any logs

Method: Use a knife on logs to carve arrow shafts. This is a low-cost, beginner-friendly way to start training.

XP: 1 experience point per arrow shaft.

Tip: Arrow shafts can be made quickly and are a great starting point.

Levels 20–35: Create Headless Arrows

Materials: Arrow shafts + feathers

Method: Attach feathers to arrow shafts to produce headless arrows.

XP: 1 experience point per headless arrow.

Tip: Feathers are easily collected from chickens or bought cheaply.

Levels 35–55: Make Regular Arrows

Materials: Headless arrows + steel or iron arrow tips

Method: Apply arrow tips to headless arrows to make complete arrows.

XP: 2 experience points per arrow (1 for headless arrow + 1 for arrow tip).

Tip: This method gives a good XP boost without being too expensive.

Levels 55–70: Craft Broad Arrows

Materials: Broad arrowheads + headless arrows

Method: Purchase broad arrowheads from Slayer Masters (requires Slayer level) and attach them to headless arrows.

XP: High experience per arrow, making it one of the fastest methods.

Tip: Investing in Slayer skill unlocks this efficient training route.

Advanced Fletching Options

Darts: Starting at level 1, you can craft darts using dart tips and feathers. This method offers very fast experience rates.

Bolts: From level 10, bolts can be made in a similar way to arrows and are useful for crossbow users.

Magic and Rune Ammunition: Higher levels unlock crafting of magic and rune arrows or bolts, which offer significant experience gains and can be sold for profit.

Efficiency Tips

Banking: Train near banks to reduce downtime when gathering and depositing materials.

Experience Boosts: Use items such as the Amulet of Glory or experience lamps to increase your XP rates.

Quest Rewards: Some quests provide Fletching experience; completing them early can give you a boost.

Fletching is a key skill for any ranged player, enabling you to create your own ammunition and save money. Join the RSgoldfast community now and enjoy buy RS gold like never before. Fast delivery, great prices and best-in-class security are waiting for you! By following this guide, you’ll level up smoothly from making simple arrow shafts to crafting powerful bolts, ensuring you’re always battle-ready in OSRS.

Skull and Bones Trophy Guide: How to Unlock House of the Ungwana

In Skull and Bones, every achievement you unlock marks progress not just in power, but in prestige. One such trophy, House of the Ungwana, ties into the mysterious capital of the Ungwana Confederacy—Jiwe. Though you can’t set foot on its shores, this guide will show you exactly how to unlock the trophy and why this region should be on every pirate radar.

Who Are the Ungwana?

The Ungwana Confederacy is a major faction in Skull and Bones, known for its thriving economy and control over valuable trade routes. Jiwe, their capital, is rich with resources and contracts that can bolster your journey—especially if you’re looking to gather rare materials or trade for high-value items.Every great pirate needs the right tools – use MMOexp to get your Skull and Bones Items today!

How to Unlock the “House of the Ungwana” Trophy

Here’s a quick breakdown of the steps you’ll need to follow:

Step 1: Sail to Jiwe

Jiwe can’t be docked at directly, but you can get close enough to interact. Navigate your ship to the island’s coastline and slow your approach to avoid missing any trigger zones.

Step 2: Use Your Telescope

Once you’re nearby, pull out your telescope and scan the entrance of Jiwe. This action alone is enough to unlock the trophy—just make sure you’re properly positioned and have a clear line of sight.

Shortcut: This is the fastest method—no need to approach too closely or interact directly.

Step 3: Interact with the Entrance (Optional)

Prefer to get up close? You can also unlock the trophy by manually sailing to the entrance and interacting using the prompted button. Both methods work, so it comes down to your preferred style.

Why Jiwe Is Worth Visiting

Unlocking the trophy is just the beginning—Jiwe offers ongoing value throughout your playthrough.

Exclusive Trade Goods

Jiwe is a prime hub for rare and valuable goods. Merchants here often stock items not found in other outposts like Saint-Anne, making it an essential stop for serious traders.

High-Yield Resources

One standout resource is hemp, which is crucial for crafting and upgrading equipment. With the right tools, you can gather large quantities quickly, giving you an edge in ship or gear development.

Contract and NPC Interactions

Interacting with the local population can lead to contract discoveries and intel on nearby events. These opportunities can open new quests and boost your standing with the Ungwana Confederacy.

Pro Tips for Visiting Jiwe

To make your trip as efficient and rewarding as possible, keep the following in mind:

Upgrade Your Telescope: A better scope lets you identify distant objectives more easily, including Jiwe’s entrance.

Stock Up Before You Sail: Ensure your ship is well-equipped with supplies and repairs. You never know what dangers you might face en route.

Plot Your Route Ahead of Time: Avoid hostile zones and optimize your journey to save time and resources.

Look for Side Quests: While near Jiwe, take a moment to explore additional questlines or contracts—it’s often worth the detour.

Unlocking the House of the Ungwana trophy is more than just ticking a box—it’s your gateway into one of the most resource-rich and strategically vital areas in Skull and Bones. Whether you’re in it for the trade goods, crafting materials, or just the satisfaction of uncovering every secret, Jiwe is worth the trip.

Want to dominate the seas faster? Head over to MMOexp to gear up with top-tier cheap Skull and Bones Silver and rise through the ranks like a true pirate king.